Our site is dedicated to helping people develop better stoves for cooking with biomass fuels in developing regions.

For additional detail and information, join the Cooking Stoves Mailing List, browse the archives, read about current projects and ask other cooking stove builders, designers, and organizations disseminating improved stoves around the world.

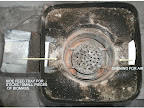
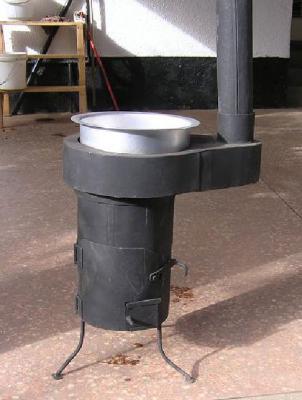
[Magh CM Laxmi [MCL]](http://e-mcl.blogspot.com/ "MAGH CM LAXMI WOODGAS STOVE") is a Natural draft woodgas stove. It is a modification of [Magh CM ](http://e-maghcm.blogspot.com/)for convenience of using all types of Biomass as fuel.

In many villages power is rarely available or available for few hours. In such a situation peoples' priority is for Natural draft stoves as compared to forced air stoves. The control on feeding fuel to the stove is another aspect, which people prefer. And more importantly the community wants freedom regarding the type of fuel to be used. They dont want to have stoves for different types of fuels, as they cannot afford as many stoves as types of fuels.

Magh CM Laxmi evolved from Magh CM. One of the user of Magh CM Ms. Laxmi, Peddamaduru village, has removed the fan and started feeding the sticks from side openings. She is able to use this stove with wood shavings and the sticks. She could use this stove for large scale cooking (12 members), during one of the festivals without any problem.

Keeping in view the adoptation factors and convenience of cooking MCL design is finalized. In honor of Ms. Laxmi the stove is named as [Magh CM Laxmi (MCL)](http://e-mcl.blogspot.com/). By increasing the height of the stove (chimney effect) the soot has been reduced.

Apart from using sticks, it is also convenient to use woodshavings / pieces of wood / leaves / dung balls / dung cakes / pellets / any small pieces of biomass fuel through the elevated side feed tray (its inclination can be controlled for fuel to slide down into the combustion zone).

In both Magh CM and Magh CM Laxmi the design enables the user to control the flames in the stove through primary air control shutter, convenience of removal of biochar. This stove costs about $6. For more information on [[Magh series stoves]](http://www.goodstove.com)

Bjarne Laustsen, January 2010, update November, 2010

Jiko Mbono is Swahili for Jatropha Stove.

This is an early version of the stove, it is now using That stove was an early prototype. It is no longer using whole seeds but instead pellets made from the pulp left over after the pressing of jatropha oil, although there is only one pelletization facility for this in Tanzania and no distribution arrangements. Now only, the Jiko Safi uses whole seeds.
The idea is to plant jatropha as a hedge around land holdings. Animals won’t eat it and around an average holding it produces enough seed for a family’s annual fuel needs. I agree that planting it as a crop isn’t ideal

*****

Jiko Mbono was developed for burning whole Jatropha seeds.
The stove is a TLUD (Top-Lit UpDraft) gasification stove with natural draft air supply.

Earlier development of Jatropha stoves have mainly been based on the use of Jatropha oil. But the use of Jatropha oil in stoves have had some problems. In wick stoves the problem have been on the high viscosity of the oil which makes it difficult to climb wick to feed the flame, this has caused the wick material to burn. Jatropha pressurised stoves have also the problems of keeping the nozzles clean, and also the complicated design which tends to make the stoves relative expensive.

I therefore got the idea to burn the seeds directly in the stove. If the gasification process could provide the heat in the stove to vaporize out the oil from the seeds in the form of gasses, that will save us the work of first mechanically pressing the oil out of the seeds.

I therefore started some experimentation with some simple stove design, and these first experiments showed that it was possible to burn the whole seeds in a stove. Further developments was however needed to get an efficient and user friendly design of the stove.

I contacted Dr. Hassan M. Rajabu from College of Engineering & Technology at University of Dar es Salaam so that we could further develop the stove and test the stove after each modification. In this development we have received valuable economical support from the US based organisation Partners for Development and also support from Pamoja INC. Engineer F. Lauwo from Tanzania Engineering and Manufacturing Design Organisation (TEMDO) have provided assistance in producing the prototypes of the stoves.


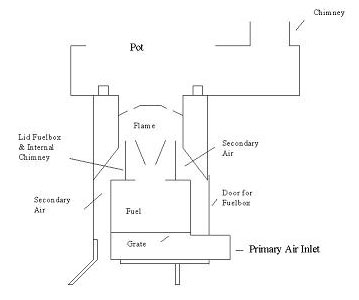
Diagram of Jiko Mbono.

The fire in the stove is normally started by having a few crushed seeds that are soaked in methylated spirit or kerosene. These crushed seeds are placed at the top of other seeds in the fuelbox and the fire is lit in these crushed seeds.
The initial process can be started inside the stove or outside. When some seeds at the top got good flames (3-5 minutes) the fuelbox is then placed on the shelve at the bottom of the stove door and the door is closed so the fuelbox get into its position in the centre of the stove. In this initial phase the primary air is kept fully open.

The pyrolysis of the seeds by supply of primary air will gradually build up and the gasses from the pyrolysis will raise by the draft from the stoves internal chimney and be burned at the top by mixing with the secondary air.

During this gradually build up of heat the primary air supply need to be reduced such that enough secondary air can be supplied to allow for a good combustion of the gasses.

The burning of the Jatropha seeds is undertaken in batch portions. After all the seeds in the fuelbox have been pyrolysis the fuelbox need to be taken out and refilled for a new burning. It is not possible at this stage of the development of the stove to refill the fuelbox when the stove is operating, such refilling will just results in heavy smoke.

With a full load of fuel 300 – 400 gram of Jatropha seeds the stove can burn for 1 to 1½ hour when used in real cooking where the fire is somehow turned down. During test we have recorded specific fuel consumption on around 52 gram seeds per liter of boiling water, and an energy efficiency around 44%. However, the high efficiency is atributed to the design of the top part of the stove where the top is inserted in a skirt.

When operated properly the carbon in the seeds will remain as some kind of charcoal.

The use of renewable fuel is important here in Tanzania, where most of the biomass fuels are harvested in natural forests which takes year to re-grow.
We have estimated that a household having 200 – 300 meters of hedges of Jatropha trees will be able to meet their own need of fuel for the household cooking. Jatropha is often planted as hedges, it is a good hedge plant, as it is not browsed by goats, cows or other animals. Also as a hedge plant it does not compete with food crops on cultivating areas.

For urban households in Tanzania Jatropha is a viable alternative to charcoal. A farmer here gets 150 Tsh for one kg of Jatropha seeds (exchange rate 1350 to $). In town the Jatropha seeds will sell for around 300 sh. An urban household will need around 2 kg seeds per day to meet their energy need for cooking, that gives a monthly energy bill of 18,000 sh. If the same households are using charcoal it will on average consume 3 bags of 30 kg charcoal of a price of not less than 15,000 sh, this gives a monthly energy bill of minimum 45,000 sh. The use of Jatropha will in this way represent a good saving and alternative to fuelwood and charcoal.

Other seeds and crop wates can also be used in the stove. We know that seeds from the Croton tree burns well so does Castor seeds. We have also tried and found that the shells from cashew nut burn well in the stove. These shells are mainly a waste product from small-scale Cashew nut processing plants which are scattered in regions growing cashew trees.. We also believe that other seeds such as the oil palm kernel could also burn well when cracked a little. There will likely be many other oil holding seeds that could be used in such a stove.

This is a three-part brief description of the World Stove Everything Nice stove made by Al Hislop and Patty Roberts, with Ron Larson participating in the first tests, January, 2010.
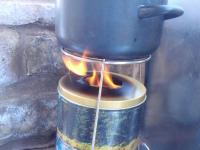
World Everything Nice StoveWorld Everything Nice Stove
Plans Available at: http://worldstove.com/wp-content/uploads/2009/11/EverythingNice_Stove_Instructions.pdf

Part A. Narrative (by Patty)

Biochar Experiment 1 1/9/10

Al made an Everything Nice pyrolyzer from the design on the World Stove website. We used a large coffee can and then a canister for the two cans so it was rather large. We first tried pine cones but they just smoked so we put in pellets instead. This gave a good clean burn and we put a tripod over the stove and boiled water, heated soup, cooked pasta and cooked pasta sauce with fresh meat and fresh vegetables. When the flame extinguished, there was still some smoke coming from the stove so it was covered on the top to remove oxygen and set in a shallow basin of water on the bottom. This extinguished the smoke but moistened the bottom of the char slightly. When we emptied the stove, we saw that some of the pellets had not pyrolyzed. We believe this was because of the fairly large diameter of the can. To dry the char and pyrolyze the remaining pellets, we put the mass into a canister and put it into our hot wood stove. This allowed complete pyrolysis of the remaining pellets and provided complete drying of the fuel. It’s possible that this changed the pH of the char from its original pH because of a different pyrolysis temperature.

Ignition: torch (for several minutes)

Pre-burn Fuel Weight: 58.5 oz wood pellets from 100% pine, less than 1% ash

Post-burn Fuel Weight (Char): 16.5 oz (28.2% of starting weight)

Post-burn Fuel Volume: Slightly greater than half of pre-burn volume

Time: 2 hours and 20 minutes of a very good, clean, strong burn.

Calculated output to pot: 560 watts
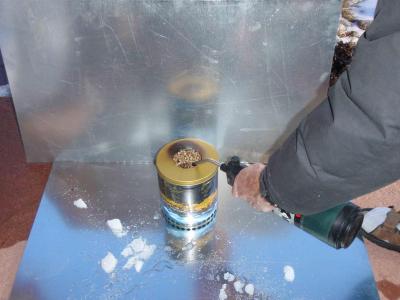

Exp1: (Saturday)
_*Lighting:*_ See text. Hope others can tell us of their successful
ways to light this same stove. We have not yet tried to solve this
problem using prepared starter materials. Maybe easier with the
"restriction-lid" removed? The two sheet metal wind-breaks and the ice
show this was not the best day for testing. Note the small amount of
discoloration (burned paint on the lid) - from an earlier test with
too-loose material (that was easier to light), which only gets a little
larger in later photos.. Discoloration off-centered because of windy
conditions and means of lighting. When we got it started with this
torch, there was never any massive smoking.
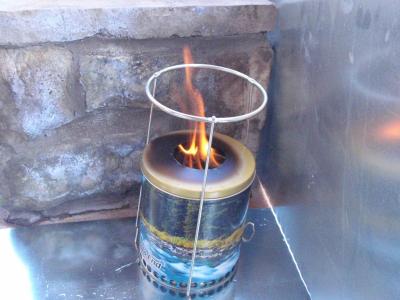
Experiment 1, Good FlameExperiment 1, Good Flame

*_Good flame_*. A typical flame without a cook-pot. We saw essentially
the same flame for a total of more than 4 hours over two experiments.
The gap-reducing bricks not in place in this early photo. The
discoloration of the lid never got much more pronounced than here -
showing that a relatively cool gas is coming up in the outer narrow
"chimney". You can't see it here - but there are hot gases going down
through the central can fuel supply - doing the pyrolysis without
oxygen. We are unsure whether any pyrolysis gas is coming upwards
(we don't understand the pressure profiles yet), but certainly a good bit
is going downward. This is the best view of the outer set of large
holes. Could they be done with a punch? Maybe. Could they be
placed on the bottom of the outer can? Maybe - with a spacer
between the bottom surfaces of the two “cans” (as is done in the
mainWorld Stove models). There are several ways
possible to control this air supply - which should NOT be called the
primary air, as would be appropriate if this were a TLUD. Although
there is some pre-mixing of the combustion gases, this still is showing
signs of being a ("wispy") diffusion flame - not at all like the tighter
much bluer flame seen in Nathaniel's numerous YouTube videos and
mentioned in the instructions.

Experiment 1, CookingExperiment 1, Cooking
*_Cooking_*: Typical flame with a typical pot (and larger ones used for
some of the cooking). The tripod was in no way optimized (we raised
the stove about three inches with standard available mini-bricks; four
inches might have given higher efficiency - but more soot). It was
certainly easy to have too much heat for cooking pasta (boil-over once
when we weren't paying attention). At no time during the two hours of
operation did we (or could we) adjust anything. We are working on a
possible fix for that, when on a later weekend, we will try a means of
controlling the air flow. You should also next see a "convection skirt"
of the type being sold by Aprovecho.

Biochar Experiment 2 1/10/10

Using the same stove as yesterday, but this time with a cone in the center to displace the area that didn’t pyrolyze yesterday, we filled the stove with pellets again. This time however the stove had 15% less fuel because of the cone. We spent about a half hour trying to light the stove with twigs, vasoline, pine needles, paper, some other fluffy combustibles and fondue fuel. None of these things got the stove going. We ended up using the torch again. The torch lit the pellets in a minute or so and then it took about 15 minutes before we saw the good, steady, smokeless cooking flame. Once we got that good flame, we measured 2 hours 23 minutes of pyrolysis. The stove burned for the about the same amount of time as yesterday, but this time all the pellets were pyrolyzed. The outer can seemed to have the same temperature pattern today as yesterday.

Ignition: torch (shorter time than yesterday)
Pre-burn Fuel Weight: 49.5 oz wood pellets (same kind as yesterday)

Post-burn Fuel Weight (Char): 14 oz (28.2 % of starting weight, same as yesterday)

Post-burn volume: a little less than half

Calculated output to pot: 287 watts (This number is much lower than yesterday’s. We don’t like our thermometer for this application, so both days’ numbers are suspect.)

Time: 2 hours 23 (more carefully measured than yesterday)

Those temperatures were pretty consistent until the pyrolysis ended and we put a cap on the top. Unlike yesterday, we didn’t put the bottom in water. Smoke began to come out of the holes at the bottom and the temperature at the bottom began to rise. We suspected that some combustion was starting to take place. We poured the pellets into a tray but they seemed to be getting hotter rather than cooler so we scooped them into another canister and put on a tight lid so no more oxygen would be available.
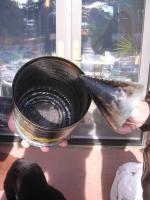
Experiment 2, ConeExperiment 2, Cone

_*Cone*_ - Showing the cone and the interior (the latter after almost
five hours of operation). No signs of any excess heat anywhere on the
outside can. Little on the inner can, but considerable tarring on the
inside and the top portion of the cone. Probably a lot of interesting
pyrolysis science in understanding why the cone looks like it does after
2+ hours of operation one time. Note the many interior small holes.
Note the single screw holding the two cans together (not shown in Nathaniel's drawings [at http://worldstove.com/wp-content/uploads/2009/11/EverythingNice_Stove_In...
] but mentioned at the bottom of p 3. We found all the instructions
complete, but guess we have to test a lot more fuel combinations before
we get the tight blue flame mentioned in the instructions.
Experiment 2, After PyrolysisExperiment 2, After Pyrolysis
Exp 2 (Sunday)
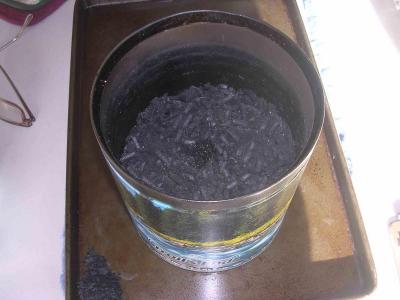
*_After Pyrolisis_* A view into the unit perhaps ten-fifteen minutes after the
unit stopped operating - and began smoking (pretty profusely, so you
want to react quickly). We placed a second lid to cover the opening -
but nothing else.(no covering of the lower holes - which we would likely
try to do next time). Note good uniformity of the char except right in
the middle where you can see the tip of the added cone. This is the first
time you can see that there are two cans - with the spacing of about a
centimeter (exact spacing dictated by can availability; this outer can is available at
about $.50-$1.00; no cost for the inner can). At the lower left is the
(pre-trimmed) pine cone which charred perfectly after being placed into
the unit.. No lighting up, no combustion, perfect retention of tiny
features - proving the lack of oxygen just below the flames seen in
other pictures. The unit was initially filled up to within 3/4 inch of
the top of the inner can, per Nathaniel's instructions, so you can see
there was perhaps 35-40% shrinkage.
Experiment 2, CharExperiment 2, Char
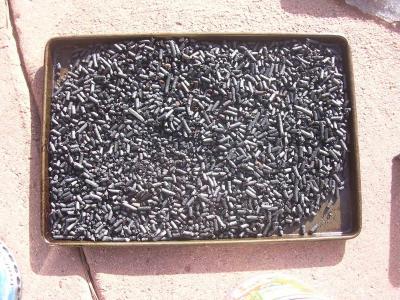
_*Exp 2 Char:*_ This to show the good uniformity of the resulting
char. Just a few that looked torrified (deep brown color - but we
can't even see them in this photo), not charred. In Experiment #1,
with no interior cone, perhaps 15% uncharred, roughly in the volume
taken up by the cone.

New plans and new ideas: We want a sliding band around the bottom of the can which can be used to regulate airflow through the holes and maybe the pyrolysis rate. When the band slides down, it will partially close the holes. When pyrolisis has finished, the band can be pushed all the way down to cover the holes entirely and keep oxygen out.

Part B. Technical Description

(by Al)

The inner tin was a Yuban Coffee can, with diameter 6.05 inches (excluding the roll bead where the bottom is attached. The original height of the can was 7.5 inches, and the height was trimmed down to 6.7 inches above the inside of the bottom surface. 74 holes .0.159 inch diameter were drilled on a line 0.75 inches from the bottom.

The outer tin was a decorative cookie tin with a fitted lid. The diameter of the can (excluding the rolled bead that attached the bottom) was 6.4 inches. A 3 inch diameter hole was cut in the center of the lid. The lid was 7.1 inches above the inside of the bottom of the can. 33 holes of 0.5 inch diameter were drilled as close as possible to the bottom of the outer can.

The inner can was filled to about ¾ inch of its top with pine pellets intended for use with pellet stoves. The weight of the fuel was 58.5 oz (1.66 kg). These pellets were ignited using a propane torch over the entire top surface for about 1 minute.

The stove operated with what appeared to be constant output for 140 minutes. A water heating test was performed with a pot set about 3 inches above the stove opening. Two liters of water was placed in a covered pot of diameter 8.5 inches and height (without lid) of 3 inches. Water temperature was measured using a “point-and-shoot” infrared thermometer. (I suspect that at higher temperatures this thermometer reads low, as it most likely senses the temperature of the steam above the water in the pot, and not the water itself.) Water start temperature was 12.5C, and finish temperature was 81.1C, at which time boiling bubbles were coming off the bottom of the pot, and much energy was being lost to steam. Elapsed time was 17 minutes.

When the flame extinguished, much smoke came from the stove, so a lid without a hole was placed on top of the stove. Smoke continued to pour from the holes at the bottom of the stove, so it was placed in a pan of water to cover the holes. This resulted in wetting of the contents of the stove. After cooling, the stove was opened and the contents examined. The fuel was found to have been converted to char, except for a portion of pellets about 1.5 inches high and 3 inches in diameter at the bottom of the stove.

Since the fuel was wet, it was not weighed. Instead, the wet fuel including the unconverted pellets was placed in a container and heated to complete pyrolization. The weight of the remaining char was 16.5 oz (28.2% original weight).

A hollow metal cone of height 4.5 inches and diameter 4.5 inches was made, and placed in the bottom of the inner can before adding fuel pellets for a second run. This time the weight of the fuel was 49.5 oz, the burn time was again 140 minutes, and the weight of the remaining char was 14 oz (28.3% original weight). This time all but 1 or 2 pellets appeared to have been converted to char.
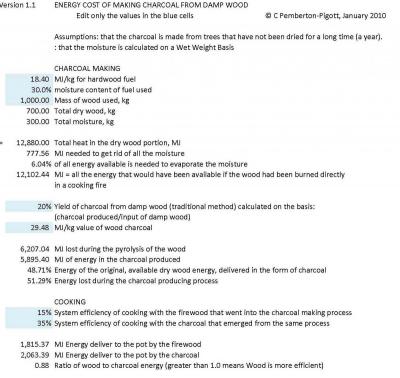
Version 1.1 ENERGY COST OF MAKING CHARCOAL FROM DAMP WOOD
Download attached spreadsheet.
Edit only the values in the blue cells © C Pemberton‐Pigott, January 2010

Nike

Jock Gill, January 2010

Grass Biochar made from a mulch hay tablet, and also from a crushed hay tablet.

See how the structure survives in the uncrushed tablet. Gifts for Runners

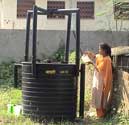
Yvonne Vögeli and How to Build the ARTI Compact Biogas Digestor, January 2010

Lively discussion on the Digestion discussion list has

Building instructions, posted on HowToPedia:
How to Build the ARTI Compact Biogas Digestor (also see the attached pdf).

Recent studies analyzing the effectiveness of this system have generously been provided by Yvonne Vögeli with Eawag / Sandec. Thier work is summarized here: Anaerobic Digestion of Organic Solid Waste

Specifically: TECHNICAL AND BIOLOGICAL PERFORMANCE OF THE ARTI COMPACT BIOGAS PLANT FOR KITCHEN WASTE -CASE STUDY FROM TANZANIA

For additional information, take a look at our earlier article: Compact Biogas Plant - Compact, low-cost digester for biogas from waste starc

Fuelage
by
Jeffrey R. Davis
www.puffergas.com

FuelageFuelage

Abstract

Fuelage is a fuel and construction material made from grass or possibly other plant material. After the grass or other plant material has properly retted it is wet extruded in the form of a pellet and allowed to dry.

BACKGROUND:

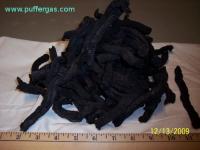
In the fall of 2007 I was experimenting with composting as a source of space heating. This is called the Thermo-Biopile [2] and can be seen in photo 17. The plant material used was switch grass and wood chips. Photo 15 is the grass field before harvesting and photo 16 is the harvest photo. During the summer of 2008 I noticed a black material when the Thermo-Biopile was disassembled. I saved some of this material to test as a feed stock for Fireballs.

You can refer to my other article in order to understand the Fireballing process [5]. The first step was to place this material in a rotating drum with rocks and then after a period of ball milling the rocks were removed and the feedstock was left in the drum to see if it would agglomerate into balls. The consistency of the material would not allow this but it might be possible if another material was added.

It became obvious that this feedstock would be best used in an extruder so I modified a meat grinder that can be viewed in photo 1. The Fuelage is drying in photo 2 and 3. I'm not sure if this material needs to be milled (in this case ball milled) some before before extruding. An extruder could be designed to dewater and maybe mill this material, thus possibly a higher density particle and shorter drying period. Photo 4 is a picture of a dried particle.

Crispin Pemberton-Pigott & Christa Roth, December, 2009


Chinese Draft Enhancer

Dear Friends

Working on advice brought by Cecil Cook from Lusaka, Peter Coughlin in
Maputo has tried using a short vertical tube (about 400mm) held over the
lighting charcoal to accelerate ignition. This tool is widely used in
Lusaka. It is typically 50mm in diameter and can be made from an piece of
scrap pipe or rolled metal sheet.

Peter reports that people using it have reported faster lighting and a
reduction in emissions during ignition (which is the smoky part of a
charcoal fire).

I tried a similar though larger tube over coal in a bucket and achieved a
dramatic reduction in particulate emissions - certainly more than 90%.

Regards
Crispin

This principle is not only limited to Zambia, it is pretty widely applied by other charcoal users in the region.
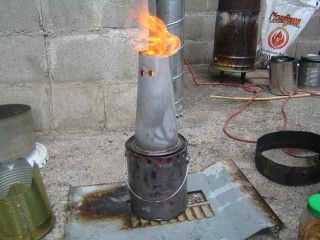
Though the most perfect 'chimney' I have got is from China: It came as a standard accessory packed in the carton of the Chinese coal-briquette stove marketed in South Africa under the name of 'Lotti stove'. I think the stove is manfuactured by Shengzhou. So it could be standard chinese practice. The conical shape with the two little air-holes on both sides shortly below the top works much better than a straight tube. We used one at stove camp this year on a two-can TLUD instead of the upper straight can and draft increased considerably. Foto attached, but not sure if it makes it on the list. regards, christa

Christa Roth, December, 2009

Good question, Tom: while we were with GTZ in Malawi, we did a lot of work on standardising the dimensions of locally produced fired portable clay stoves (model adopted from Practical Action's work in Kenya). Their selling price ranges from 1- 3 $ in the communities. We all agree that stove-wise, they are not the greatest devices, but the most affordable, accessible and convenient ones in this area. As people mostly don't have kitchens, portability ranges high on the priority list of peoples choices, so mudstoves are not an option here.

Thus we had to work with the available material to produce a stove that people wanted and could afford. With the help of simple moulds and measuring tools we worked towards a uniformity of this artisanal product and standardise the crucial points influencing stove
performance: size of the door, height of the fire-chamber, durability and shape of potrests to ensure a standard gap between stove body and pot., to name a few.
I never had a chance to get the stoves tested for emissions, but they do reduce fuel consumption as compared to the open fire, while the amount of reduction depends more on the user than the stove itself.
I can't quantify the change in performance achieved by these quality control measures, but they definitely led to a much better uniformity and acceptance of this artisanal product. A good-looking stove just sells better!

A couple of the presentations from the ASEAN-US NEXT-GENERATION COOK STOVE WORKSHOP, November 19, 2009.

One is a great study by Dr. Modi of Columbia University of several stoves in Tanzania, and the other is some useful info from Tami Bond. Kirk also gave a very useful presentation, but unfortunately it was not included in the proceedings.

Pages

Subscribe to Improved Biomass Cooking Stoves RSS