Jock Gill, March 2010
Here I show the 4th can used in the P80 design. It is a 1 quart paint can.
I believe the holes are unnecessary and will try a new can tomorrow. This
can acts to collect and focus the thermal energy in a 3" diameter column.
Works very well.
Can #1 is the 3 lbs Costco burn pot with 4 lbs of softwood pellets.
Can #2 is Weber charcoal chimney used, in this case, to make charcoal, not
burn it.
Can #3 is the second Costco can that will go around the the focusing can an
support the "gas drip pan" and gas grate.
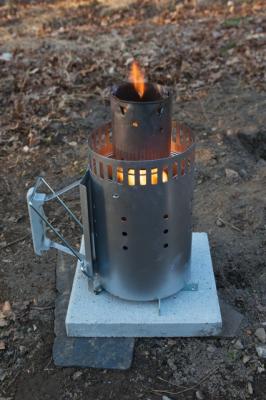
So the p80 design has two inner cans and two outer cans. The outer cans stay
relatively cool and help keep the heat in the system.
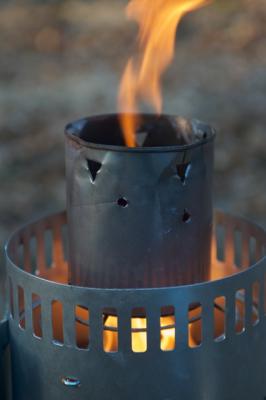
View of can #4 'catching' the flames from the pyrolysis zone below it. It is resting on the "basket" in the Weber can.
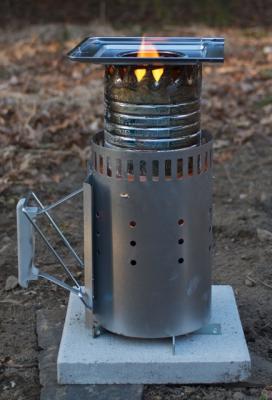
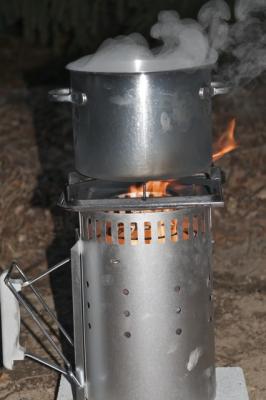
All four cans are now in place and working. This shows the "gas drip pan" in place on the top of the second coffee can. It has a 3 9/16th diameter hole, and is aligned with the 3 inch diameter focusing can just below it. Thanks to Paul who made me aware of this common TLUD design feature.
Note: The top coffee can is just hot enough to soften the pain on its sides, but not to burn it! At this stage, the bottom of the Weber can is cool enough to touch. The gap between the two coffee cans is about two inches and allows plenty of secondary air to enter the system. I also expect that the two outer cans help to keep the inner cans a bit cooler and more evenly heated. I do not think that even the burn pot has any cherry red sections.
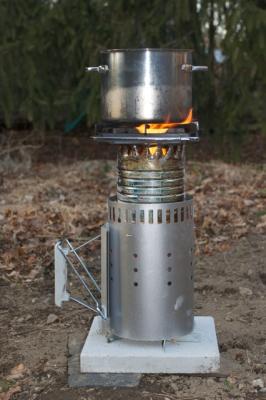
This shows the full C4 configuration with the gas grate in place and a 4.7 liter pot with 2.5 liters of ambient temp water in it. The water started at about 12 degrees C. The pot was placed on the C4 13 minutes after the fire was lit. The water boiled in 30 minutes and was kept boiling for another 36 minutes. The wood gas ran out just two minutes later.
The above details conform to the specs for a 2.5 liter WBT.
Note: I do not believe the top coffee can needs any holes in it. I will test this when I get my hands on another one.
If the 3rd and 4th cans are removed, and the drip pan and grate are mounted directly on the Weber can, as in this photo, the water simmers, but will not maintain a boil. The heat from a candle is greatest just above the flame tip. The same seems to be true here as well.
The time from ignition to dumping the biochar into the quench can was 81 minutes. Right in the expected range.
Tomorrow I will show you how elegant this looks from a standing position. If a cabinet were built around this such that only the gas drip pan and grate showed on top, it would look very 'sexy' and modern. Of course, it would be required that you could easily remove all of the parts below the drip pan for easy refueling, biochar capture, and maintenance. This should be fairly straight forward as the C4 design is very well behaved and the flame and heat are well managed. There is almost no heat expressed laterally and the flame stays with in the system until it exits the hole in the drip pan. It is quite beautiful, even if I do say so myself.
My daughter thinks this design would be improved if there were a variable "shutter" that could vary the amount of the pyrolysis surface that was exposed.
For the latest updates see the flickr feed http://www.flickr.com/photos/jockgill/
Comments? Suggestions?
Thanks,
JockFASHION NEWS