Jigger Mould Making for the Maputo Ceramic Stove
Crispin Pemberton Pigott, New Dawn Engineering, March 7 2007
[img_assist|nid=1523|title=Finished, cured moulds|desc=|link=node|align=left|width=400|height=387]
This is a set of pictures to show the process for making the moulds. The results are quite impressive - smooth and hard, beautifully formed. We can make about 10 or more moulds per day using the Jigger mould holder as a form.
See also: Making the mould
00 Water is delivered by push cart
01 Apply vaseline to inner core
02 Outer form apply vaseline
03 Place the inner core onto the locating pin
04 Inner core in position
05 Tighten thumbscrew
06 Thumbscrew tightened
07 ALMOD 60 is measured 2.5 red containers 11 kg
08 ALMOD 60 is 190 mm deep
09 Water is 140 mm deep
10 Add the ALMOD 60 to the water
11 Stir vigorously with a wisk in a way that minimizes bubble formation
12 Pour in the mix while knocking it
13 Fill up the form
14 Smooth the top surface
15 Screwin teh extracting hammer shaft
16 Place the formon its side
17 Slide the hammer hard along the shaft to extract the center
18 The center core starts to come out
19 Remove the center core
20 Center core is out
21 Looking into the mould while still in the form
22 Carefully tap the top edge of the mould downwards
23 Tap the outside of the mould, top and bottom
24 Mould starts to emerge from the form
25 Remove the mould
26 Finished mould
27 Lookinginto the fresh mould
28 Bottomview of the fresh mould
29 Finished mould,note the Vaseline fingerprint streaks
30 Finished, cured mould
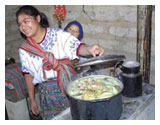
31 Finished, cured moulds
32 Defect, Material too thick when poured